Winter has finally caught up on us, after an amazing autumn. Nights have steadily been getting cooler but the sun has warmed our days like nothing else. I was still walking around the garden wearing only a tee shirt a couple of days ago (and I hate being cold), how great is that? Meanwhile in the northern hemisphere I hear summer is not looking to good so far. My mum lives in Nice and last time we skyped she was wearing a wooly. Another friend sent me photos of a storm that left the "promenade des Anglais" (literally "the English's walkway") looking not so French Riviera. He said it would prove wrong anyone who claimed the Mediterranean wasn't a sea!
Anyway, with colder days I am not so motivated to spend my few free hours in the evening sewing in a cold room, so my shop hasn't been updated for a while and I haven't produced much apart from custom orders. I have been lacking the motivation and the combination of cold weather and shorter days makes the weeks fly by with not much to show for. I also have been working on my first patchwork project ever.
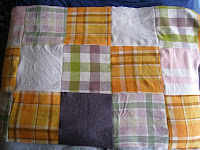
We decided to make woolen blanket curtains to try and keep the heat in (cheaper than investing in double glazing) and I didn't want them to look ugly. I've got eight panels to make (for 4 windows) and the first ones are looking great. I have just run out of blankets though and it's getting harder to find some now.
Having never made curtains before, I felt a bit daunted by getting the measurements wrong and how much supplies I'd need but luckily I found a great tutorial in on of the World Sweet World magazine I have at home. Sadly there are no more coming issues of this little gem, but the great thing is they kept the website and blog running and they recently posted that same tutorial. how very timely and nice of them.
Showing posts with label woolen blanket. Show all posts
Showing posts with label woolen blanket. Show all posts
Friday, May 21, 2010
Sunday, January 31, 2010
MAKE YOUR OWN: pillow cover
This is the first time I've published a tutorial, so any comments, feedback and tips on how to explain things are more than welcome! I've chosen an easy one to start with, there are probably hundreds of patterns for pillow covers online already but I hope you enjoy it nonetheless.
I love old woolen blankets, so much that I have a (very) long term project of re-upholstering our couches with them. It's so easy to upcycle (i.e. take a second hand object and find a new purpose for it) them, they are basically one big sheet of fabric just waiting to be used. Here's an idea on how to refresh the look of your sitting room without spending too much and in an eco-friendly way!
- Level: easy
- Time: 45mn
- Material: woolen blanket, thick cotton (upholstery or similar in weight), thread, buttons (everything can be found in second hand/ thrift shops or gathered from friends and family)
- Tools: sewing machine (with buttonhole and button attachments), scissors, measuring tape
 1- Cut out a 45cm square in the woolen blanket for the front panel, a 45x28cm and a 45x34cm panels in the upholstery fabric for the back. If you wish to put an appliqué on the front panel, cut it out as well (I usually draw it on some paper first, then cut it out and draw the outline on the fabric.
2- Sew on the appliqué (for the one shown, I used the front of a jacket so didn’t sew an appliqué on). Sew one edge on both back panels: measure 4cm from the edge, fold wrong side of fabric on wrong side. Measure 1cm from the edge and fold under. Pin down and sew along the edge.
3- Make buttonholes: fold the smallest back panel in half lengthwise; make a mark with a pen. Fold the half in half and make another mark, repeat for the other side. Measure the size of your buttons. Then make the buttonholes parallel to the width of the panel.
 4- Sew buttons on: match the big back panel with the small one, sewn edges facing. Mark with a pen where the buttons are going to be sewn. Sew buttons on.
 5- Button up the back panels and then sew on the sides where the sewn edges meet. This is so they don’t move when you sew back and front panels together.
 6- Place the front panel on a flat surface, right side facing up, then place the back panels on top, wrong side facing up. Pin together and then sew. Undo the buttons, turn it inside out, et voila.
Subscribe to:
Posts (Atom)


